


Has anyone ever dreamt of creating tools for some precision metalworking? To a certain level, a home-made metal lathe is in itself a project. But it will also open up a world of possibilities in metalworking. So whether you are an experienced craftsman or a curious beginner, building a metal lathe from scratch is a worthy challenge that combines creativity with technical skill. In this guide, you will find all the essential information about creating a metal lathe, from key components to step-by-step assembly instructions. By the end of this process, not only will you have a fully working metal lathe, but you will also feel confident and able to take on many other metalworking projects. So, get ready to start turning raw materials into impressive products—the very first step in a metalworking journey!
Introduction to Metal Lathes

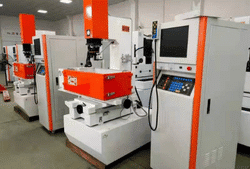
A metal lathe is an aptly named machine tool that applies force and shapes metal components with precision. The workpiece, by rotating the metal about a fixed axis, is subjected to material removal by contour cutting with the specified tool. With this, it turns out to be milling cylindrical shapes, threading, or drilling, while adding the final touches to other finer details. The machining metal lathe becomes very useful in producing customized parts and high-precision components in industries such as manufacturing, engineering, and the automotive sector.
What is a Metal Lathe?
Used for metal shaping and machining, metal lathes are versatile machines that transform workpieces from a mass into precise forms and designs. The tool operates primarily by clamping the workpiece and turning it about a stationary axis to subtract material using various cutting tools. Metal lathes are capable of making cylindrical shapes with threading, drilling, knurling, and boring operations with superb accuracy. In recent times, metal lathes have incorporated technologically advanced CNC (Computer Numerical Control) technology, enabling them to produce high-quality products with greater automation.
Precision Standard: Most metal lathes can meet tighter tolerances, usually in the range of 0.001 inch or less, making it a tool for high-accuracy, demanding jobs.
Metal lathes come in various sizes and capacities, ranging from small bench-top models for hobbyists to large industrial models for mass production. Metal lathes are used more often in the aerospace, automotive, and manufacturing sectors to produce components for shafts, bushings, and very intricate fittings. Newer advancements have also created hybrid metal lathes that combine traditional lathe functions with milling capabilities, thereby increasing their functionality.
The Importance of Metal Working
Metalworking plays a crucial role in laying the foundation for several industries and modern economies. It comprises processes such as machining, welding, forging, and casting, through which industries manufacture everything from infrastructure components to high-end devices. It has contributed significantly to the world’s ever-expanding industrial growth today, with the metal fabrication market expected to exceed $30 billion by 2031 as demand rises in the automotive, construction, and aerospace sectors.
Technology is the most excellent enhancer for metalworking in terms of efficiency and precision. CNC machining, for example, enables both custom detailing and high-scale production, making it relevant to fields such as medical device manufacturing and renewable energy installations. Moreover, with the emphasis on sustainability, recyclable materials and energy-saving methods in metalworking processes are now being preferred.
Its metalworking significance extends beyond structural; innovation also depends on it. The manufacturing of lightweight and durable alloys is revolutionizing the development of electric vehicles, wind turbines, and aerospace engineering. Overall, metalworking is indispensable for conventional production and industries and technologies that are growing.
Benefits of a Homemade Metal Lathe
Building a homemade metal lathe is a good idea for hobbyists and professionals. Here are the key advantages:
| Benefit | Commercial Lathe | Homemade Lathe |
|---|---|---|
| Cost | $1,000 – $10,000 | Fraction of commercial price |
| Customization | Limited to manufacturer specs | Complete design freedom |
| Learning Value | Minimal | Comprehensive understanding |
| Environmental Impact | New materials/manufacturing | Recycled/repurposed materials |
Firstly, it offers a considerable cost-saving opportunity. Commercial lathes can cost anywhere between $1,000 and $10,000, depending on the features and size. In contrast, a homemade version can often be achieved for a fraction of that price, using repurposed materials and components.
Next, building a homemade metal lathe provides more room for customizations pertinent to one’s specific necessities. Designing your lathe by yourself works well with the kind of projects you intend to do, whether it’s working on fine metalwork or following precise dimensions that aren’t easily fulfillable by a commercial lathe. This kind of liberty becomes a friend to do-it-yourself types and small-scale producers who may sometimes require one-of-a-kind setups.
Another benefit is that going through the entire operation will enhance your ability to build and use a lathe, which in turn improves your hands-on skills. You will learn basic machining principles, sharpen your problem-solving skills throughout this endeavor, and it will also foster a more personal attachment to your work.
Lastly, they are much more environmentally friendly. The less one wastes by buying used or, in some way, reusing any equipment component, the more it contributes to eco-friendly metalworking. These machines, if assembled and maintained well, can be relied upon for many tasks where the commercial ones are also very efficient.
Essential Tools and Materials for Your Lathe Project

There is a wide array of tools and materials one needs to begin the lathe project. Such things include the following:
- Frame Materials: Steel angles, aluminum bars, or wooden planks, depending on your design requirements.
- Motor: An old electric motor from an appliance can frequently serve the purpose suitably.
- Spindle Bearings: Sturdy ball bearings, either bought new or salvaged from old machinery.
- Belts and Pulleys: The drive belt system goes from the motor to the spindle assembly.
- Chuck or Faceplate: To hold a workpiece firmly in position during machining.
- Cutting Tools: Carbide-tipped or HSS tools for various types of machining.
- Fasteners: Bolts, screws, and nuts designed to secure the assembled parts together.
- Measuring Instruments: Calipers, rules, and squares to ensure exact measurements during building.
- Power Supply: A wire and switch to connect and control an electric motor safely.
With these tools and materials in hand, you are well on your way to erecting a lathe that works and serves well.
List of Required Tools
The listed tools and materials are required to build and operate the lathe:
- Lathe Bed and Frame: A solid base to carry all the components, providing stability while running.
- Cutting Tools: HSS or carbide-tipped cutting tools are essential in machining for shaping, cutting, and finishing materials.
- Chucks and Tool Holders: Use to hold the workpiece firmly and safeguard the cutting tool during machining.
- Fasteners: These are bolts, screws, washers, and nuts used to assemble and secure all components.
- Power Supply and Motor: A source providing power and an electric motor to get the lathe running. Include wiring, a control switch, and possibly a variable-speed controller.
- Headstock and Tailstock: The headstock holds the workpiece while the tailstock supports it during operations. Proper alignment is essential for accuracy.
- Measuring Instruments: Precision instruments, such as calipers, micrometers, rulers, and precision squares, are necessary for all measurements that require dimensional accuracy.
- Lubrication and Coolant System: To reduce friction and heat generated during machining, thereby enabling a calm operation and a prolonged life of tools.
- Lathe Tool Accessories: Center drills, live centers, and spacers are a few of the accessories that will be applied to assist with specific lathe tasks.
- Protective Gear: Include safety goggles, gloves, and hearing protection for physical safety while working on the lathe.
These tools comprise a core set required to assemble and use a lathe with accuracy, efficiency, and safety.
Choosing the Right Scrap Materials
Choosing scrap materials is a critical aspect for making machining and manufacturing processes cost-efficient while ensuring high-quality outcomes. To begin, it is essential to learn or understand certain material classifications. Scrap metals are generally categorized into two main types: ferrous (including steel and iron) and non-ferrous (comprising aluminum, copper, and brass). Ferrous metals are magnetic, durable, and designed for structural uses, whereas non-ferrous metals are lightweight, corrosion-resistant, and suitable for delicate parts.
Material Selection Tips:
- Aluminum: Among the most highly recycled and in-demand non-ferrous scrap materials, recycling saves nearly 95% less energy compared to new production
- Steel: Leading material for structural elements, can be recycled numerous times without quality loss
- Nickel-based alloys: Ideal for aerospace and heat-intensive industries due to heat resistance and strength
- Copper and alloys: Perfect for electrical and plumbing jobs due to conductivity and corrosion resistance
In addition to availability and cost, factors such as material composition, strength, corrosion resistance, and temperature resistance are essential in selecting scrap materials for a particular application. Choose, for example, the nickel-based alloys in aerospace and heat-intensive industries owing to their heat resistance and strength. Meanwhile, copper and its alloys-brass and bronze-are considered in electrical and plumbing jobs for their conductivity and anti-corrosion resistance.
Ethical and environmental considerations should also be taken into account. Some governments and organizations are emphasizing the implementation of materials sourced and recyclable in an ethical manner for lessened ecological impact. Second, using top-quality recycled and scrap materials contributes to less waste production and sustainability efforts.
By carefully identifying material properties and matching them to the project’s needs, manufacturers can achieve an optimal balance between cost, performance, and environmental responsibility when selecting scrap materials.
Welding Techniques for Lathe Construction
Welding provides structural integrity, precision, and durability to lathes through a series of structural steps. MIG, TIG, and stick welding are usually courses of action followed by professionals. Each has its merits, depending on the materials to be joined and the level of precision required for the welding process.
| Welding Type | Best For | Advantages | Applications |
|---|---|---|---|
| MIG Welding | Steel and aluminum parts | Easy to learn, fast welding | General lathe components |
| TIG Welding | Thin or delicate welds | High precision and accuracy | Stainless steel and aluminum parts |
| Stick Welding | Heavy, thick materials | Convenient and economical | Lathe frames and heavy structures |
MIG Welding: An easy weld to learn, MIG welding feeds a wire electrode through a welding gun. It welds steel and aluminum lathe parts with ease and speed.
TIG Welding: More difficult yet more accurate, the TIG welding method is preferred for thin or delicate welds and is used extensively with stainless steel and aluminum parts.
Stick Welding: This method is convenient and economical, working well in all environments. It is typically used for heavier, thicker materials usually found in lathe frames.
Important: Once the surfaces are prepared, cleaning and aligning the materials are crucial to achieving a good and precise weld. Welders should also pay attention to heat control to minimize warping as much as possible, thereby facilitating the lathe’s precise and stable operation.
Selecting the right materials and welding with expertise will ensure the lathe is known as a high-performing and long-lasting machine.
Step-by-Step Guide to Building Your Metal Lathe

1. Planning and Design: The first step involves sketching the lathe design, including its dimensions, components, and specific features. Consider the type of work you might use the lathe for and select a design suitable for the said job.
2. Material Selection: Select high-quality materials for the frame, bed, and other key components. Steel or cast iron is preferred because of their strength and stability. Make sure no defects are present in all your chosen materials and that they can be welded or machined.
3. Surface Preparation: Before assembly begins, clean and align all surfaces to ensure a smooth and accurate fit. Such treatment helps the materials fit well together and creates a good base for welding and assembly.
4. Welding and Assembly: Weld the frame and attach the bed. Be cautious and keep a constant eye on the heat, avoiding excessive temperatures at any point during welding. This can result in distortion, causing the lathe to lose accuracy and structural integrity.
5. Component Installation: Install the parts, such as the spindle, chuck, and motor, with care to suit your specific design. All moving parts should align properly and function smoothly.
6. Testing and Calibration: Once assembled, test the lathe to verify that it operates according to its intended purpose. Calibrate the components to ensure accuracy and, if necessary, adjust them accordingly.
7. Finishing: Apply a protective coating or paint to prevent rust. Finally, give it a thorough inspection to ensure the lathe is sturdy and accurate, ready for use.
If one follows these steps with complete interest in every aspect, one will end up with a dependable and efficient metal lathe that is built for effectiveness, rather than merely putting it to good use.
Planning Your Lathe Design
A lathe-making project is all about function, precision, and durability. After deciding on the type of lathe you need, such as a bench lathe, an engine lathe, or a CNC lathe, depending on the materials you want to work with and the size of your projects, go for it! CNC lathes, for example, provide the capability to create very complex designs with great accuracy, allowing tolerances as tight as ±0.0001 inches to be achieved. This, therefore, makes such machinery most suitable for hi-tech manufacturing.
Motor Selection Guidelines:
- Smaller lathes: 1-2 HP motors are typically sufficient
- Heavy-duty machines: Require 5 HP or higher motors
Materials for various parts of the lathe need to be carefully considered. Generally, steel and cast iron are preferred as they offer sufficient strength and dampen vibrations, thereby assuring a stable operation during machining processes. When choosing a motor, consider the amount of horsepower you need. Smaller lathes often do just fine with 1-2 HP, while more heavy-duty machines require a motor in the range of 5 HP or higher.
With safety in mind, incorporate ergonomic factors such as a comfortable working height and controls that are reachable without strain to enhance the operator’s efficiency. Nowadays, the assistance of electronics, such as digital readouts (DRO) and advanced control systems, is of great help in enhancing accuracy and ease of use. If you are careful about planning each design feature, the lathe will deliver consistent operation that caters to your needs in various projects and will stand the test of time through many years of use.
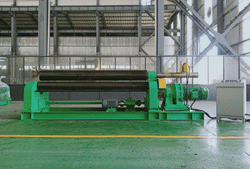
Constructing the Base and Frame
The base and frame comprise the foundation of a lathe, thus playing a vital role in stability, durability, and precision. Cast iron, with its ability to reduce vibrations and high strength, is typically preferred in base construction. Polymer concretes are currently an attractive alternative, given their superior vibration absorption characteristics and the advantage of being used to build lightweight yet sturdy machines. The base should provide a nearly level surface, with enough mass to minimize displacement during operation.
In frame design, steel is commonly used for its strength and durability. To achieve greater precision, they should be fabricated with minimal tolerances, which can be achieved either through CNC machining or specialized welding techniques. Data reveal that a well-framed, reinforced well can hold down deflection under load by about 30%, thereby increasing machining accuracy. Another advantage of locating adjustable leveling pads underneath a base is that they can compensate for uneven floor levels, keeping the machine steady and horizontal.
Remember to provide for coolant drainage systems and maintenance access while designing the base and frame. These features will upgrade the lathe’s performance and bring with them increased operational efficiency. The base and frame will be the perfect platform for your lathe if they are engineered well.
Assembling the Lathe Components
- Prepare the Workspace: Ensure that the assembly locus is clean, well-illuminated, organized, and fitted with the necessary tools and safety equipment. Confirm that the base and frame of the machine are suitably aligned and leveled.
- Install the Headstock: Position the headstock in the designated location on the lathe bed. Tighten the bolts to fix the headstock while aligning it with the center axis of the lathe, because any deviation could cause errors during operation.
- Mount the Tailstock: Place the tailstock on the lathe bed and align the tailstock with the headstock. Use alignment tools, such as a dial indicator, for fine adjustments as necessary.
- Attach the Toolpost: Attach the toolpost to the carriage assembly and ensure it is fastened securely. The toolpost can then be adjusted as needed to accommodate the various tooling requirements.
- Fit the Chuck or Faceplate: Carefully mount the chuck or faceplate onto the spindle nose, ensuring it is securely in place so that it cannot move during operation.
- Install the Leadscrew and Feed Rod (if applicable): Mount the leadscrew and feed rod in place, ensuring that they are aligned with the carriage and apron for smooth operation.
- Drive Assembly Connection: Attach the belts or gears according to your specific lathe model, and ensure that the drive components are properly tensioned and aligned for effective power transmission.
- Lubrication verification: Ensure all moving parts, including bearings, leadscrews, and gears, are lubricated correctly according to the manufacturer’s recommendations.
- Test Run: Turn on the lathe for a quick test run to verify that all components are functioning correctly. Watch out for any unusual noise, vibrations, or signs of misalignment, and rectify all those areas.
If you follow these steps meticulously, your lathe should be assembled correctly, ensuring it functions properly and lasts for a long time. Always consult your manufacturer’s manual for extra guidance specific to your model.
Creating Threads and Specifications

Since exact measurements must be followed while doing lathe work for threads, selecting the type and size of thread must be the first step. The technical specifications or the design requirements will determine what thread is to be made. Next, set the lathe to the appropriate spindle speed and feed rate, as these settings vary depending on the material and thread pitch. Use the correct cutting tool to create the threads, ensuring it is correctly aligned with the workpiece. A trial cut is to be performed on a scrap piece to allow for setting adjustments before performing the actual threading. Measure the threads regularly to ensure they are within the required dimensions. This will ensure correct and consistent threading. In every case, however, safety must be your first consideration.
Understanding Threading in Metal Lathes
Threading on metal lathes requires high precision, and alongside that, one must be familiar with advanced techniques and standards. Most modern lathes can include CNC (Computer Numerical Control) systems that perform threading with extreme precision. They allow the execution of all thread types—metric, imperial, and non-standard —on several materials, ranging from aluminum and steel to exotic alloys.
Threading Tool Specifications:
- United and Metric threads: 60-degree angle
- British Standard Whitworth threads: 55-degree angle
- Cutting speed: 30-50% of the regular turning speed to prevent overheating
Tool geometry is essential in threading operations. For example, single-point threading tools commonly have a defined angle of 60 degrees for United and Metric threads and 55 degrees for British Standard Whitworth threads. Correct tool selection reduces tool wear, thereby producing clear profiles, while cutting speeds have a greater impact on the quality of threads. It is recommended that cutting should begin at a speed of 30-50% of the regular turning speed for the given material to prevent tool overheating and maintain sharpness.
The data show that applying lubricant or coolant while threading improves the appearance of threads and increases tool life by reducing the heat generated. The most widely used coolants are oil-based coolants and synthetic cutting fluids, both of which have excellent flame dissipation and chip removal properties.
In the case of non-manual lathes, software advancements permit the operation of complex thread profiles through user-friendly interfaces, including tapered or multi-start threads. Thread gauges and micrometers are therefore required to verify that dimensional accuracy has been achieved during and after threading operations.
Using the processes and instruments described above, machinists can create highly accurate and dependable threads. Setting up best practices to follow in setup, calibration, and monitoring that ensure repeatability has become a necessity for manufacturers today.
Setting Up Threading Tools
Thread cutting requires a complex setup process to achieve optimum efficiency and precision. Initially, all tooling elements, such as threading inserts, holders, and cutting tools, should be cleaned of any debris that may be present. Even the minutest contamination can create errors in a delicate operation. Pick the threading tool according to the material and threading specifications. For example, carbide threading inserts are generally recommended for their longevity and tolerance maintenance at high cutting speeds.
Critical Tolerance: Modern machining specifications consider a deviation as small as 0.01 mm to be sufficient to affect the integrity of threads, especially those subjected to high mechanical stresses.
Machine calibration is the very next process. Depending on the material, adjust for cutting speed, depth of cut, and feed to avoid overheating or premature wear. To illustrate with an example, stainless steel requires lower speeds than aluminum due to its thermal properties and tensile strength. According to common CNC practice, standard thread types, such as ISO Metric or Unified, are programmed with corresponding cycles in the CNC machine.
Check the alignment between the threading tool and the workpiece using precision measuring instruments, such as digital micrometers and thread pitch gauges. Misalignment can lead to cross-threading or uneven profiles.
Additionally, suitable coolants or lubricants are used during threading to prevent overheating of the threads and maintain the desired surface finish. Studies indicate that using the most appropriate coolant can reduce tool wear by 20% and significantly improve thread quality. Thus, by following these steps, threading would proceed accurately and efficiently, regardless of the complexity or high precision involved.
Common Threading Techniques
Several threading processes are widely utilized and find application in various materials and contexts. An understanding of these processes ensures that the product is made to the specified tolerance in a precise and efficient manner.
| Technique | Best Applications | Key Benefits | Strength Advantage |
|---|---|---|---|
| Tapping | Internal threads in softer materials | Easy to use, coated taps increase life by 25% | Standard strength |
| Thread Turning | Large diameter or unusual profiles | CNC increases efficiency by 30% | High precision |
| Thread Milling | Large diameter or difficult materials | Tolerances as tight as ±0.01 mm | Superior control |
| Rolling Threads | High-strength applications | Enhanced grain flow structure | 20-30% higher tensile strength |
| Grinding Threads | Extremely high precision parts | Excellent surface finish | Tolerances to ±0.002 mm |
Tapping
Tapping involves using a tap tool to create internal threads in holes. It is generally preferred for softer materials like aluminum or plastics, but with improved tap designs, it can now equally work on hard alloys. Modern tapping tools feature spiral flutes, which facilitate the evacuation of chips, thereby enhancing thread quality and reducing tool breakage. For instance, coated taps can be used to increase tool life by up to 25% under high-volume production.
Thread Turning
This process utilizes a lathe to cut internal or external threads. It is suitable for workpieces with large diameters or unusual profiles. Thread turning is now more accurate and repeatable with the advent of CNC lathes. Hence, the present data show that multi-axis CNC machines can increase threading efficiency by 30% for the mass production of complex designs.
Thread Milling
Thread milling is a threading process that utilizes a rotating cutting tool, providing greater flexibility and control compared to the traditional tapping procedure. It is most suitable for large diameter or difficult-to-machine materials. Thanks to the precise control of modern thread milling tools, threads with tolerances as acceptable as ±0.01 mm can be realized.
Rolling Threads
It rolls the threads at high pressure from hardened dies, causing plastic deformation of the workpiece surface rather than cutting away threads. It forms stronger threads through enhanced grain flow. This process is widely used in parts that require high strength and durability, such as those found in automotive and aerospace components. Statistics also show that rolled threads can have 20-30% higher tensile strength than cut threads, which is why the industry often considers them for critical applications.
Grinding Threads
Thread grinding is typically used for applications requiring extremely high precision, involving the use of a specially designed grinding wheel to grind the threads. The thread grinding process is necessary for producing threads with excellent finishes and very tight tolerances. For example, aerospace components are typically ground to meet stringent specifications, where tolerances can be as tight as ±0.002 mm for critical parts.
Materials used, thread specifications, and the scale of production must all be considered before choosing a particular process for threading. Utilizing advancements in modern threading technology can significantly enhance quality and efficiency, leading to increased competition in the industry.
Sharing Your Homemade Metal Lathe Experience

A homemade metal lathe can be both challenging and rewarding as an experience. Consider first assembling materials such as steel, screws, and a small motor, bearing in mind that these should all be durable and suitable for machining purposes. Select a detailed plan or blueprint that includes dimensioning and assembly steps to prevent potential mistakes. During assembly, emphasis is placed on conceptualizing the correct alignment of the chuck to the spindle, as well as the tool rest. After assembly, it is necessary to conduct testing to ensure the lathe runs smoothly and safely. Techniques of safety must be highly regarded, such as wearing protective gear and working in a safe environment. Patience and diligence will enable a homemade lathe to produce accurate results for small machining-based projects.
Joining Metal Working Forums
Joining metalworking forums enables both beginners and experienced machinists to interact with like-minded individuals in a community. These sites offer resources, ranging from troubleshooting a project at hand to reviewing tool options and inspiring new project ideas. Members may impart their knowledge, seek answers, and share experiences for mutual benefit. Good forums usually have sub-forums where different aspects of or topics related to a subject can be discussed, such as setting up a lathe, specific welding applications, or metal finishing, making it relatively easy to find information concerning particular areas of interest. They may also consist of tutorials, but in the form of photos or videos, which are particularly effective for visual learners. Through these communities, users update their skills, stay informed about current trends, and receive assistance with their machining projects.
Documenting Your Project Journey
When describing my project journey, I emphasize the importance of keeping detailed records for each stage of the process, from planning and material selection through to the completion of the product. I document my progress and obstacles through photographs, videos, and notes, which parallel my reflection on the learning process and also provide me an opportunity to share some wisdom with peers in the machining community. Organized and clear documentation ensures that my projects are thoroughly documented for future reference or collaborative efforts.
Tips for Collaborating with Other DIY Enthusiasts
- Communicate Clearly and Often: Open and consistent communication brings productive collaboration. Utilize platforms like group chats, emails, or project management sites to generate ideas, coordinate progress, or simply bring issues to the forefront. When communication is clear, everyone is on time for the teamwork set out at hand and makes the foreseeable contribution.
- Assign Roles and Responsibilities: Assign specific roles to each participant based on their skills and expertise. This would alleviate duplication of efforts and instead allow all members to work to their strengths, thereby creating a more fulfilling and productive working environment.
- Share Resources and Knowledge: Sharing of tools, materials, and knowledge among team members should be encouraged. Sharing tips, tutorial information, or learning experiences from past projects does wonders in stimulating creativity and yielding better results for their collective effort.
- Set Realistic Goals and Deadlines: Set tangible targets and deadlines, taking into consideration each participant’s time management and availability. Continue to refer to these deadlines to maintain momentum and address issues that hinder progress.
- Celebrate Milestones Together: Celebrate and appreciate all milestones accomplished together. Acknowledging any achievement, whether big or small, encourages motivation throughout the entire group and fosters a sense of camaraderie within the team.
Conclusion
Building a homemade metal lathe represents one of the most rewarding projects a craftsman can undertake, combining technical skill, creativity, and practical application into a single endeavor. Throughout this comprehensive guide, we’ve explored every aspect of creating your own precision metalworking machine, from understanding the fundamental principles of metal lathes to mastering advanced threading techniques.
The journey from conception to completion offers invaluable learning opportunities that extend far beyond the finished product. By carefully selecting materials, mastering welding techniques, and methodically assembling each component, builders gain deep insights into machining principles while creating a tool perfectly suited to their specific needs. The cost savings—often reducing expenses from $1,000-$10,000 to a fraction of that amount—make this project accessible to hobbyists and small-scale manufacturers alike.
The threading capabilities, precision tolerances achievable within 0.001 inches, and customization possibilities ensure that your homemade lathe will serve as a cornerstone tool for countless future projects. Whether you’re producing automotive components, aerospace parts, or intricate artistic pieces, the skills and knowledge gained through this process will continue to pay dividends throughout your metalworking journey.
Remember that building a metal lathe is not just about creating a machine—it’s about joining a community of makers, innovators, and craftspeople who understand the value of precision, dedication, and continuous learning. Share your experiences, document your progress, and collaborate with fellow enthusiasts to push the boundaries of what’s possible with homemade metalworking equipment.
Reference Sources
Frequently Asked Questions (FAQs)
What is a homemade metal lathe?
A homemade metal lathe is a tool used for machining metal workpieces against a rotating workpiece. This tool can be used in various metalworking processes, including turning, drilling, and threading. Many DIY enthusiasts create their own metal lathes using scrap materials to customize the machines to suit their specific needs.
How do I make my metal lathe?
To build your metal lathe, you will need to collect several materials, including aluminum castings, a motor, machine components, and other accessories such as bearings and pulleys. Various plans are available for free via Internet forums, such as homemadetools.net, or can be obtained by following designs stemming from Gingery’s lathe projects. Set up a sturdy base first, then attach the headstock, followed by the carriage, and finally the spindle to complete the machine’s assembly.
What are the main parts of a metal lathe?
The primary components of a metal lathe include the headstock, tailstock, carriage, bed, and motor. The headstock consists of the spindle, bushing, sleeve, chuck, or four jaw chuck, and must hold one end of the workpiece. The carriage is movable in a straight line along the bed, controlling the machining of the workpiece material.
Is it possible to do metalworking on a wood lathe?
In some cases, a wood lathe can be used for light metalworking activities; however, it lacks the precision and rigidity required for metalworking. A homemade metal lathe is generally better suited for working with tougher materials and finer tolerances, especially on metals such as aluminum, cast iron, and other harder metals.
What kind of tools will I need for the homemade metal lathe project?
For your homemade metal lathe project, assembly tools such as a drill, grinder, and welder will be helpful. You may want to consider using a drill chuck, alignment tools, and measuring instruments to ensure the accuracy of your metalworking tasks.
Where would I even begin looking for DIY lathe plans?
DIY lathe plans are available at websites such as homemadetools.net and different metalworking forums. Many hobbyists have shared their designs and their experiences, which can lead you through the steps of building a metal lathe from scratch.
What materials are suitable for building a metal lathe?
Good materials to use for building a metal lathe include cast iron for the bed, as it is very rigid and also dampens vibrations. Aluminum should be used for the lighter parts. Using high-quality bearings and a strong motor will enhance the performance and lifespan of your homemade metal lathe.
How do I care for my homemade metal lathe?
To maintain your homemade metal lathe, regularly clean the machine and lubricate the moving parts, such as the bearings and spindle. Inspect the chuck and all other parts for wear and tear, and replace them as necessary. Also, keep the lathe aligned and calibrated for accurate metalworking work.